This is a guide for creating a new web application in Visual Studio running as a container in a Kubernetes cluster on Azure. Note that I have created a similar guide for VSCode here.
Before starting, this assumes you have
- Visual Studio installed, with a working knowledge of creating web applications
- The Azure CLI installed and in your path
- You have a working Azure account, with some basic knowledge of how to navigate it
Create a Web Application
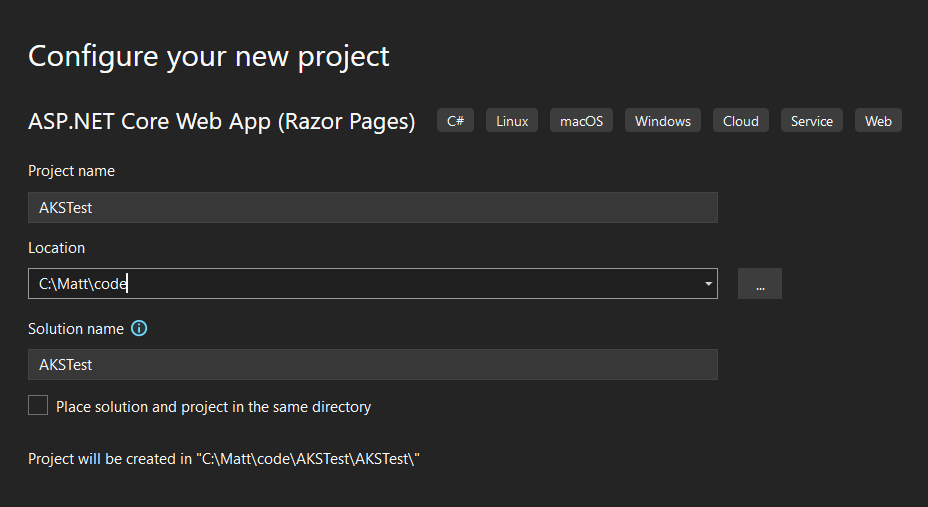
- Create a new web application project in Visual Studio

- Edit your Index.cshtml file so it has some dynamic data. I changed the HTML portion of mine to this:
<div class="text-center"> <h1 class="display-4">Welcome</h1> This is your page running in AKS! <hr /> This page loaded on the server at @System.DateTime.Now.ToString("HH:mm:ss, dd MMMM yyyy") </div> - Run your project locally to ensure it works correctly.
Create a Container Registry
- Head on over to the Azure Portal
- Go to Container registries and click Create
- Select the appropriate subscription and resource group
- Create a name for your registry, I used mattakscr
- Select a location
- Select the Basic pricing plan (this can be changed later)
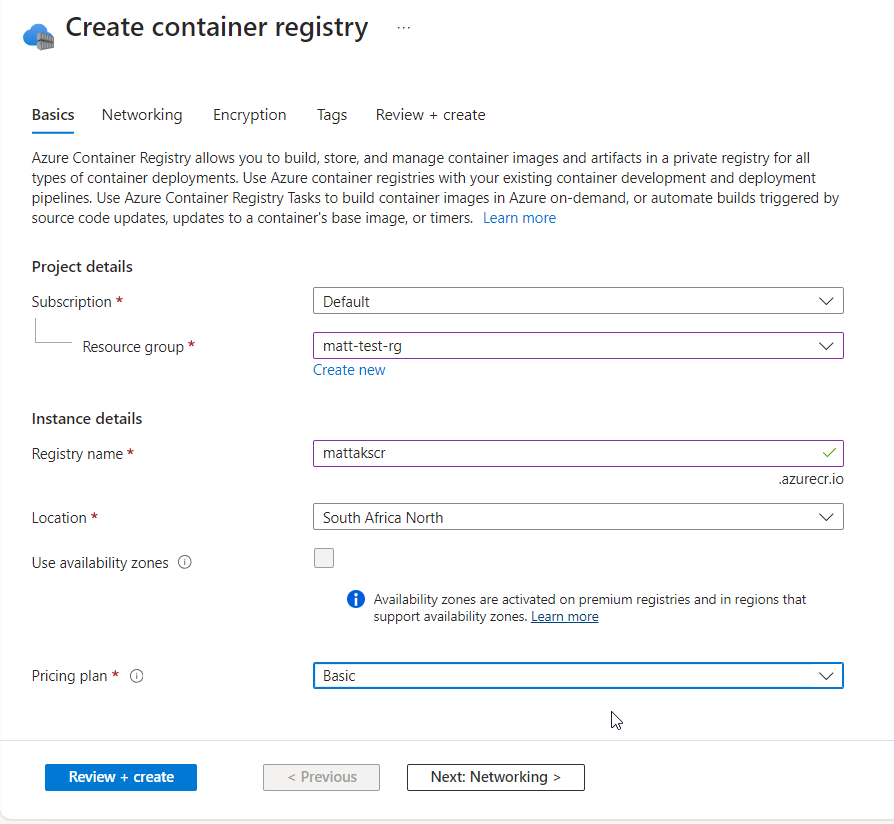
- Click Review + Create, and then Create
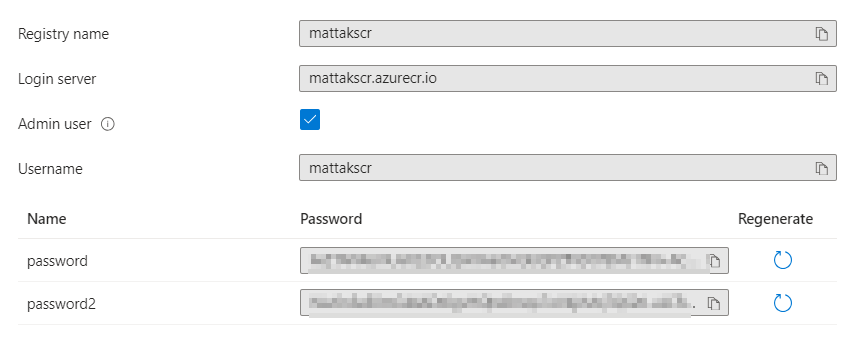
- Wait for the deployment to complete, and you can then go to the resource
- Click Access keys on the left and enable the admin user
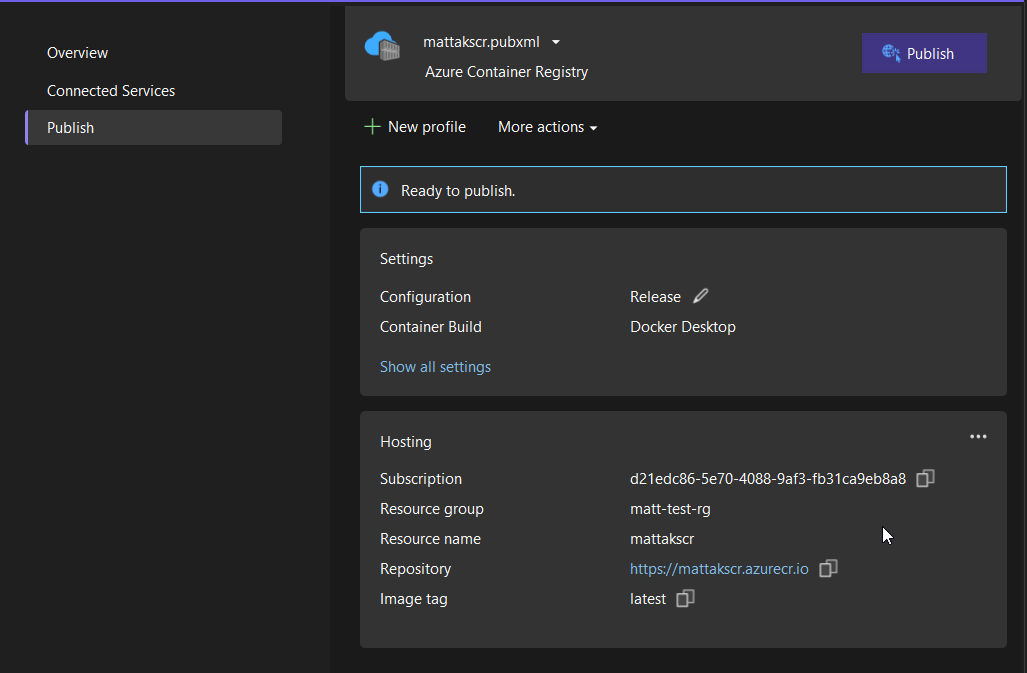
Publish your Application to Azure
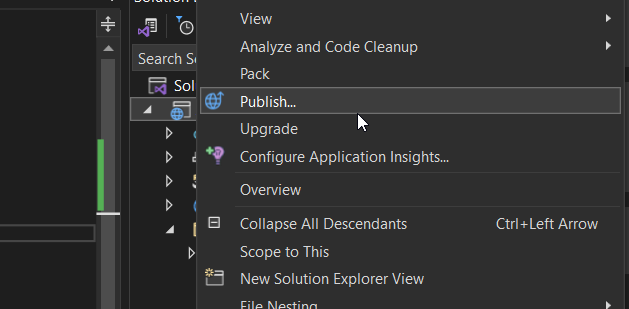
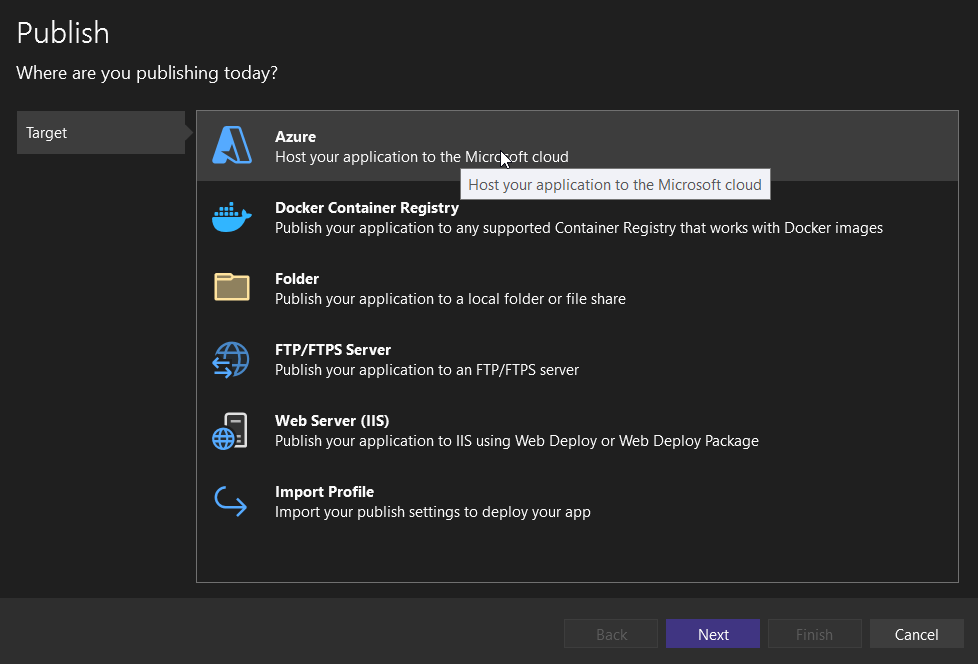
- Right-click you project and click publish
- Select Azure as your publish target
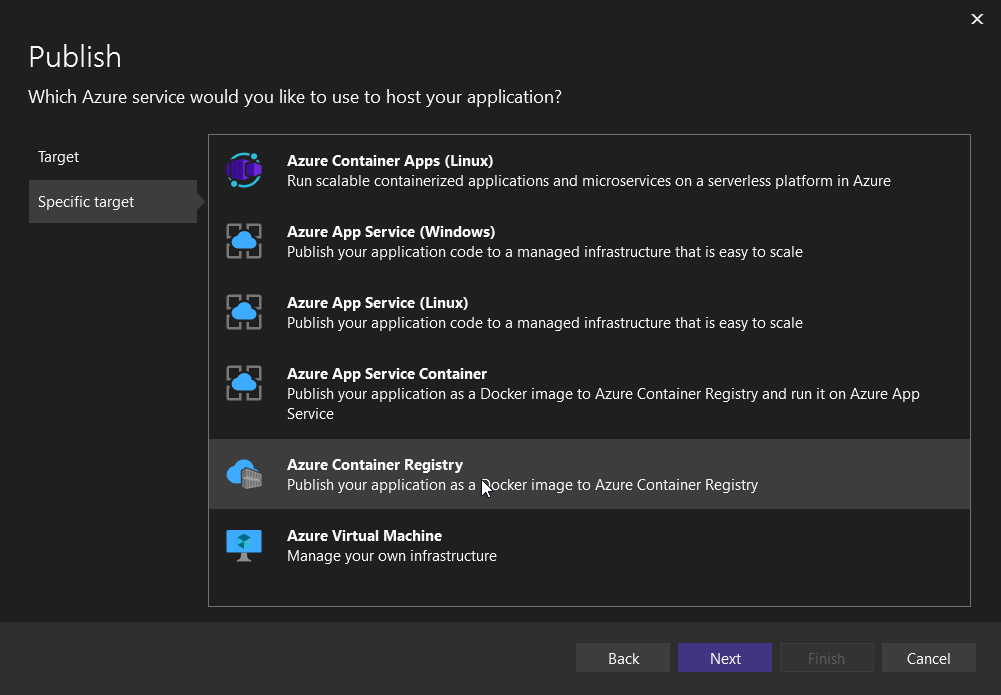
- Select Azure container registry
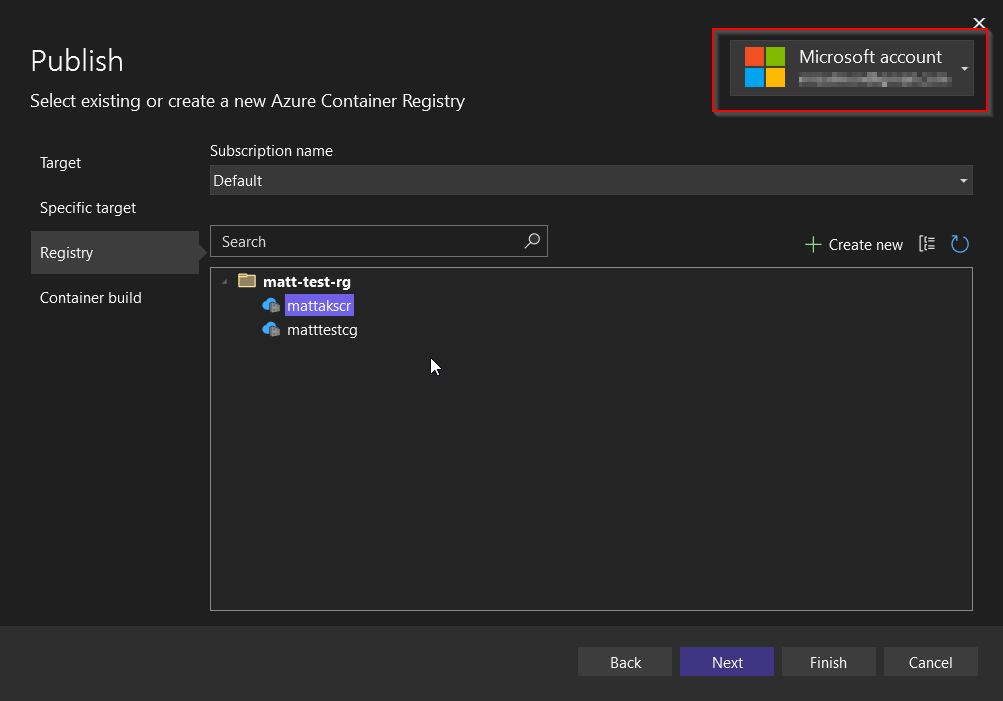
- At this point you may need to sign into your Microsoft account. Once signed in, you should see your resource group which contains your container registry
- Select Docker Desktop
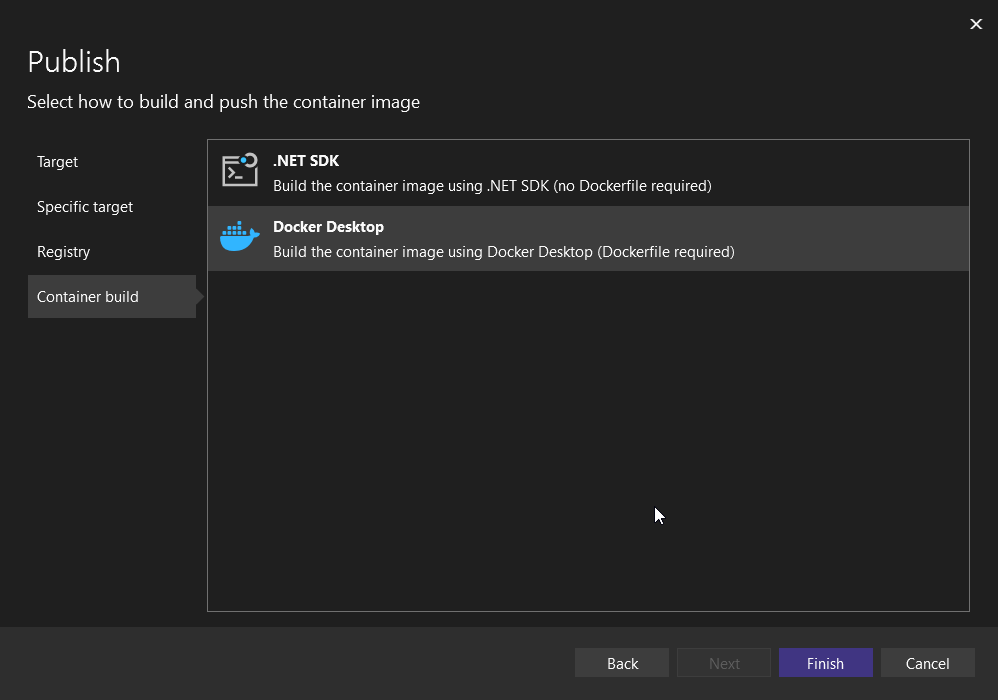
- Close the window, and publish to Azure (note: this can take a long time!)
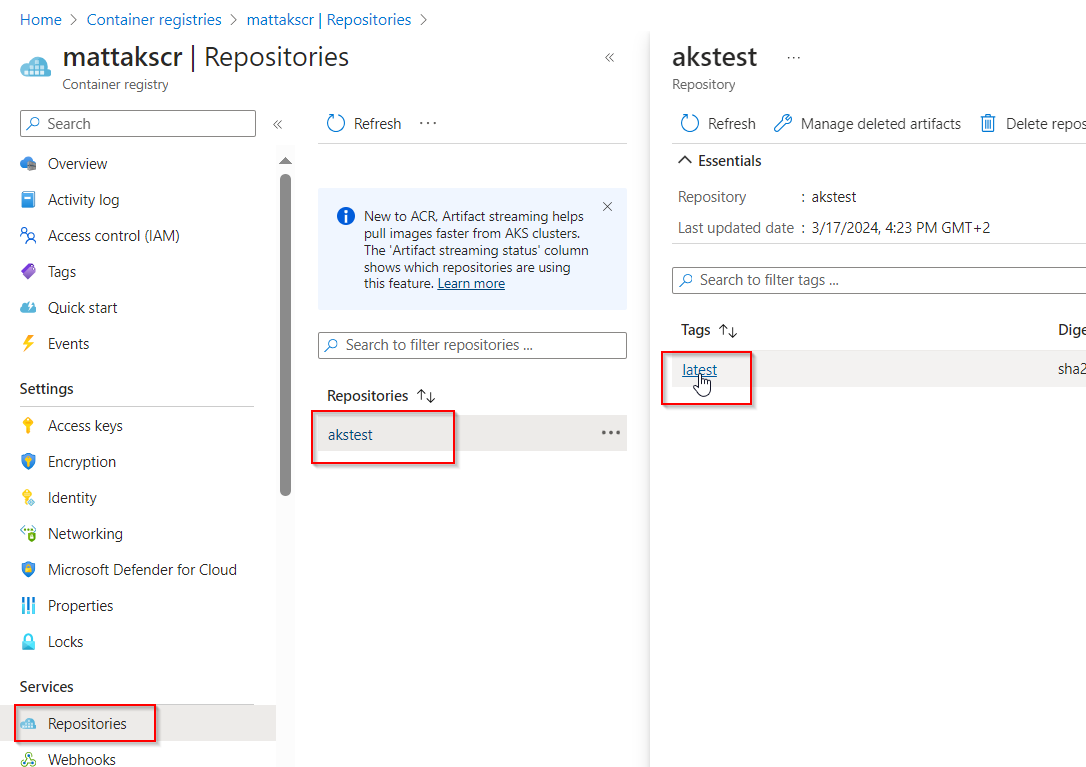
- Once complete, if you head back to Azure and look at the repositories in your container registry, you should see an artifact for your web app:
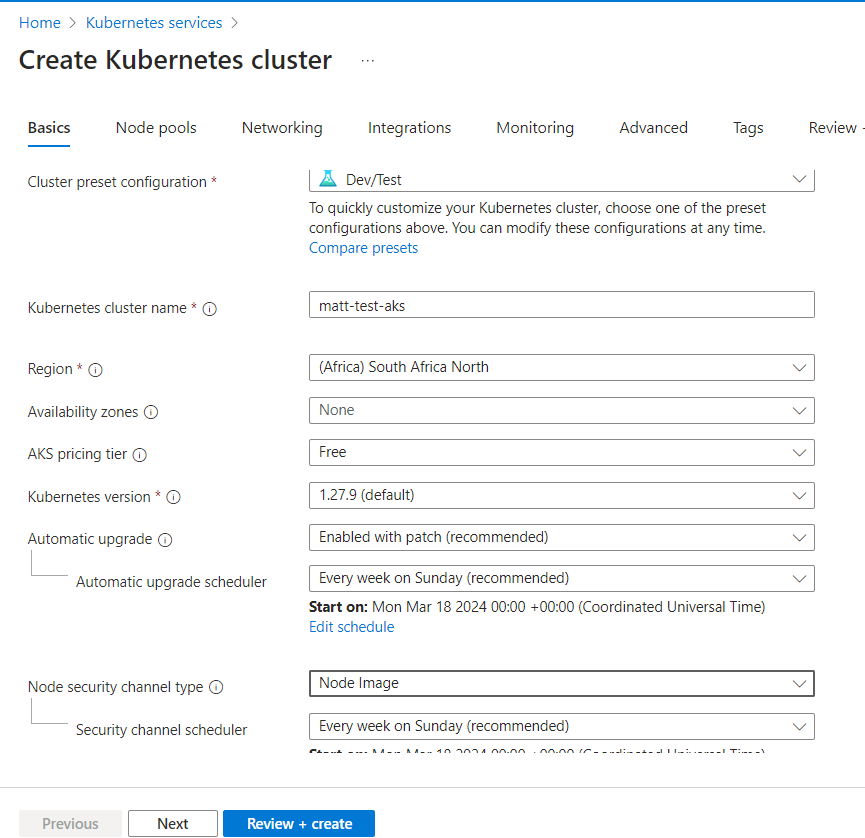
Create your AKS Cluster
- Go to Kubernetes Services in the Azure portal
- Click Create, and Create Kubernetes cluster
- Complete the form
- Make sure you select the correct resource group
- Use the Dev/Test preset configuration
- Select the appropriate region
- Use the Free pricing tier
- Select an upgrade path - the default Enabled with patch is recommended, as only minor version updates will be applied
- Navigate to the Integrations tab
- Select the container registry you created earlier
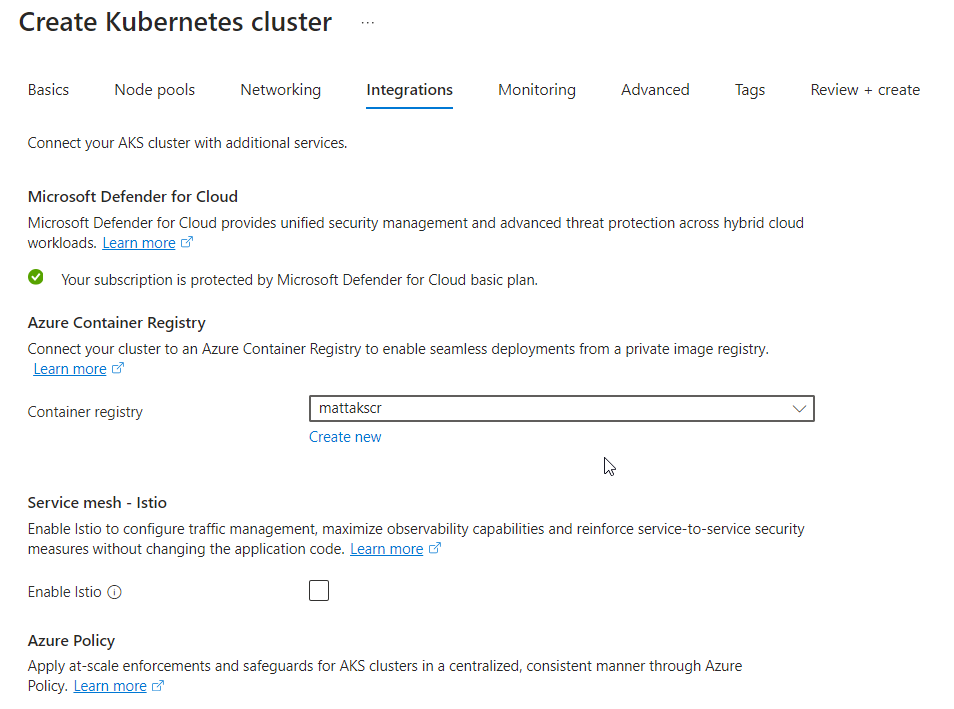
- Click Review + create, wait for validation to complete, and then click Create
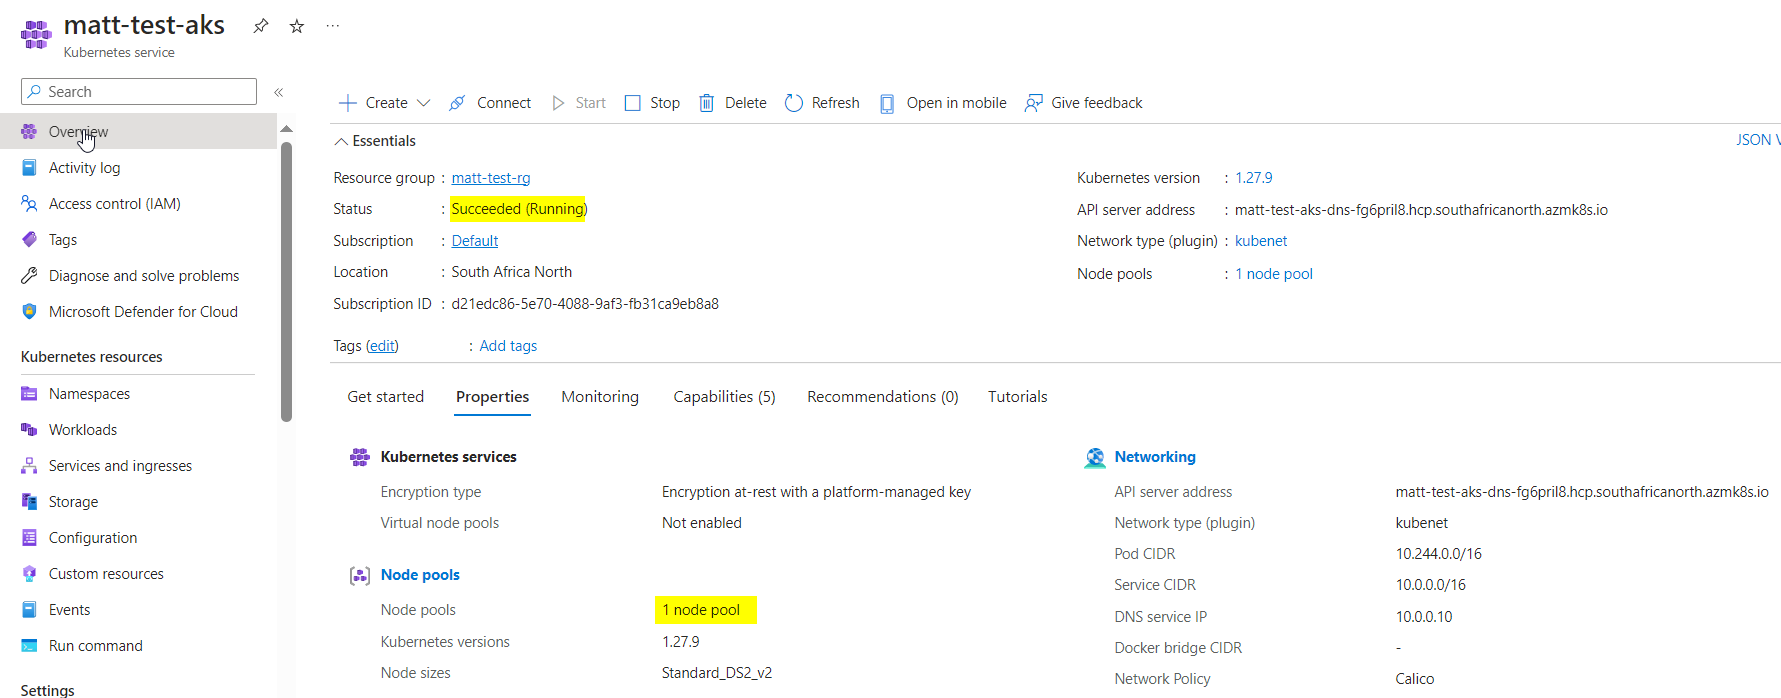
- AKS clusters take quite a while to deploy, but once up and running you should be able to navigate to the resource and confirm it is up and running.
Deploy your Container to AKS
- Open a Powershell window
- If you have never used AKS before, you will need to install the AKS CLI
az aks install-cli - Close the Powershell command window, and reopen it again - this is so the AKS CLI is correctly in your path
- Run
az loginto ensure you are logged into your Azure account in the CLI - Connect to the AKS cluster, using your resource group instead of
matt-test-regand your AKS cluster name instead ofmatt-test-aksaz aks get-credentials --resource-group matt-test-rg --name matt-test-aksThis is required so the
kubectlcommand has the credentials to work with our AKS cluster. - If you run the following command
kubectl get nodesyou should now see the nodes that are ready for you - these are determined by AKS and will change dynamically.

- Create a
deployment.yamlfile like the following: ```yml apiVersion: apps/v1 kind: Deployment metadata: name: matt-aks-test spec: selector: matchLabels: app: matt-aks-test template: metadata: labels: app: matt-aks-test spec: containers: - name: matt-aks-test image: mattakscr.azurecr.io/akstest:latest resources: limits: memory: “128Mi” cpu: “500m” ports: - containerPort: 80 — apiVersion: v1 kind: Service metadata: name: matt-aks-test spec: type: LoadBalancer ports:- port: 80
targetPort: 5004
selector:
app: matt-aks-test
``` Make sure you replace the image with your repository name (found under Container registries / Repositories) and replacematt-aks-testwith your container application name.
- port: 80
targetPort: 5004
selector:
app: matt-aks-test
- Run the following command from the command line:
kubectl apply -f .\deployment.yamlThis should result in your service being created in Azure.
- Head back to the portal and go to your Kubernetes cluster, and click Services and ingresses. You should see your application
appearing with a Type of LoadBalancer, which means it is available externally (the other services are internal services).
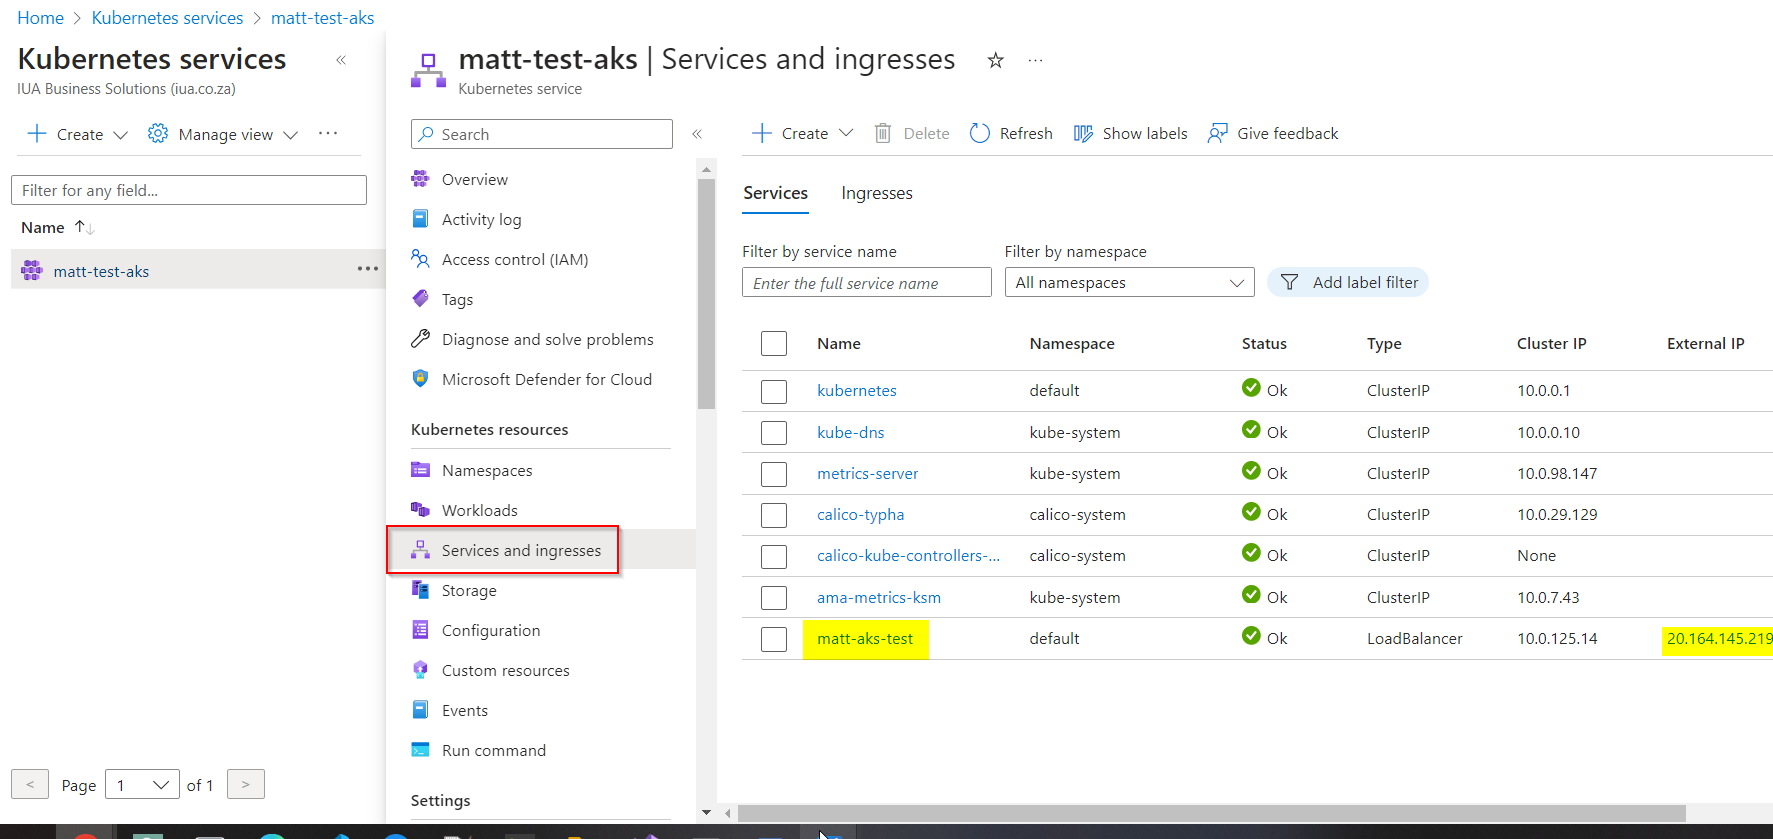
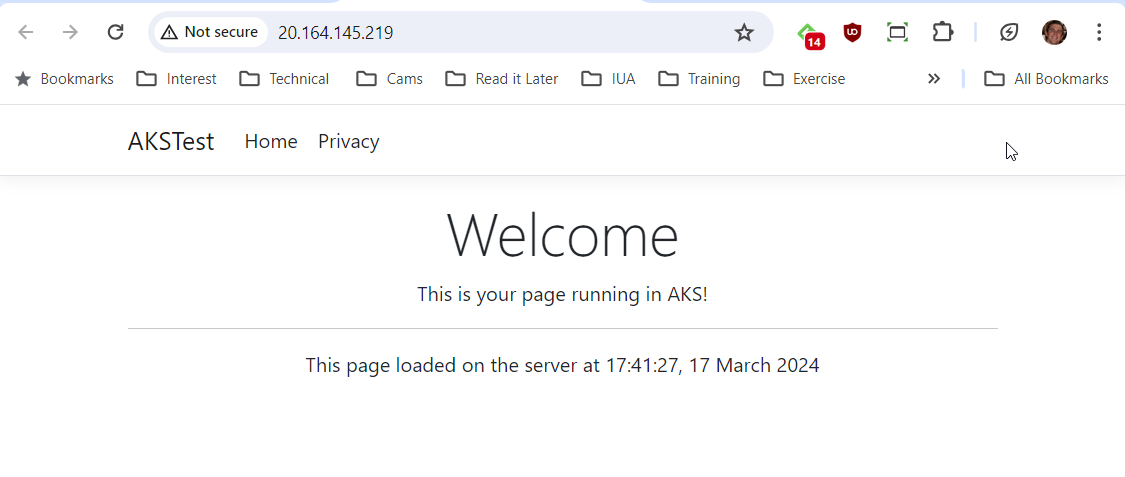
- You will also see the external IP address of your service. If you click that, it should now load your service in the browser.
Project launchSettings and Dockerfile
It is important to ensure that the Dockerfile exposes the correct ports, and tie up to the application launch settings. My default files created by Visual Studio did not tie up and
resulted in my web site timing out. I had to adjust the ports in the two files, republish
my container, and then reapply the deploy with kubectl.
launchSettings.json
 {
  "profiles": {
    "AKSTest": {
      "commandName": "Project",
      "launchBrowser": true,
      "environmentVariables": {
        "ASPNETCORE_ENVIRONMENT": "Development"
      },
      "dotnetRunMessages": true,
      "applicationUrl": "https://localhost:5005;http://localhost:5004"
    },
    "IIS Express": {
      "commandName": "IISExpress",
      "launchBrowser": true,
      "environmentVariables": {
        "ASPNETCORE_ENVIRONMENT": "Development"
      }
    },
    "Docker": {
      "commandName": "Docker",
      "launchBrowser": true,
      "launchUrl": "{Scheme}://{ServiceHost}:{ServicePort}",
      "environmentVariables": {
        "ASPNETCORE_URLS": "https://+:443;http://+:80"
      },
      "publishAllPorts": true,
      "useSSL": true
    }
  },
  "iisSettings": {
    "windowsAuthentication": false,
    "anonymousAuthentication": true,
    "iisExpress": {
      "applicationUrl": "http://localhost:41470",
      "sslPort": 44317
    }
  }
}
Dockerfile
FROM mcr.microsoft.com/dotnet/aspnet:6.0 AS base
WORKDIR /app
EXPOSE 5004
ENV ASPNETCORE_URLS=http://+:5004

FROM mcr.microsoft.com/dotnet/sdk:6.0 AS build
ARG BUILD_CONFIGURATION=Release
WORKDIR /src
COPY ["AKSTest/AKSTest.csproj", "AKSTest/"]
RUN dotnet restore "./AKSTest/./AKSTest.csproj"
COPY . .
WORKDIR "/src/AKSTest"
RUN dotnet build "./AKSTest.csproj" -c $BUILD_CONFIGURATION -o /app/build

FROM build AS publish
ARG BUILD_CONFIGURATION=Release
RUN dotnet publish "./AKSTest.csproj" -c $BUILD_CONFIGURATION -o /app/publish /p:UseAppHost=false

FROM base AS final
WORKDIR /app
COPY --from=publish /app/publish .
ENTRYPOINT ["dotnet", "AKSTest.dll"]