Azure App Services provides fully managed web hosting, allowing you to publish web sites to Azure without having to worry about to the underlying Virtual machine or any other infrastructure. Azure manages upgrades of the underlying servers, security, compliance, etc..
At the time of writing, Azure App Services supports:
- Platforms: .NET, .NET Core, Node.JS, Java, Python, and PHP
- Containers
- Web Apps
- Web API
- Web Jobs (Batch processes)
Some things to note:
- On Azure, you can view resource consumption (CPU, Memory, Data, etc.) for your App Service by going to the “App Service Plan” option (not available for Free plan)
- You can set scaling options on the “Scale out” menu option, including rule-based autoscaling. If you are on the Free plan, you will only have an option to change your plan.
- Outbound IP addresses can be seen on the “Overview” tab, in case you need to create firewall rules for your application.
- App Services are accessible via http and https - you can enfore https only in the TLS/SSL settings in the App Service menu.
- App Services also support batch processes or continuous jobs
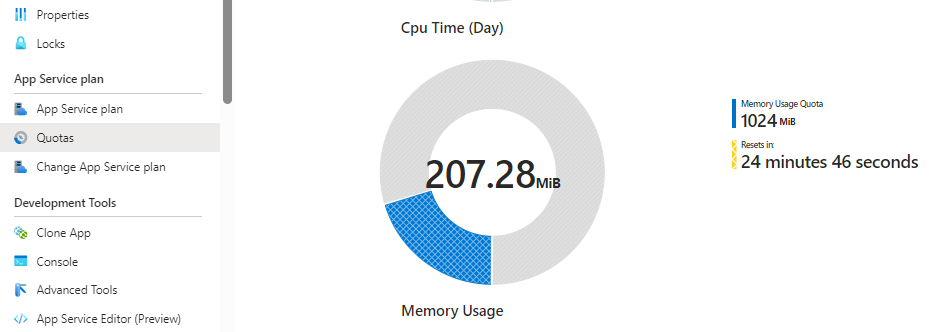
- The Quotas menu option can be used to view your Memory, CPU, and Data usage:
- App Services cannot be deallocated. They can be stopped, but you will continue to pay for them until you delete them.
Create a New App Service
If you use Visual Studio Code (and assuming you have a working application), deployment is extremely easy and can be done as follows:
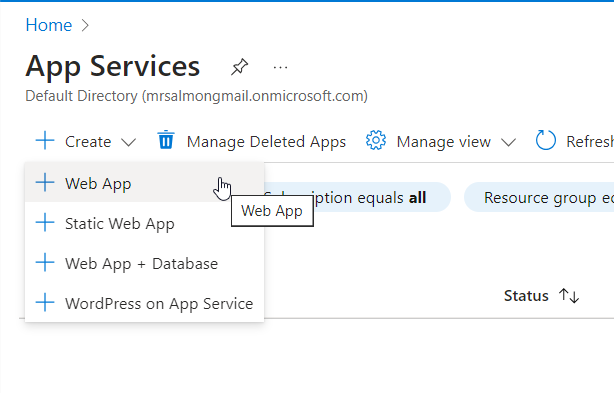
- Navigate to App Services in the Azure portal
- Create a new Web App
- Enter web app details in the form
- Instance Details / Name: this needs to be completely unique
- Runtime stack: can be .NET, Java, Python, PHP, etc.
- OS: Linux is significantly cheaper
- Pricing Plan: There is a free plan for testing, although it does not have many features available to the paid plans. This can be changed later.
- Create your Web App
Deployment
- Install the Azure extensions to VSCode (Azure Account, Azure App Service, etc)
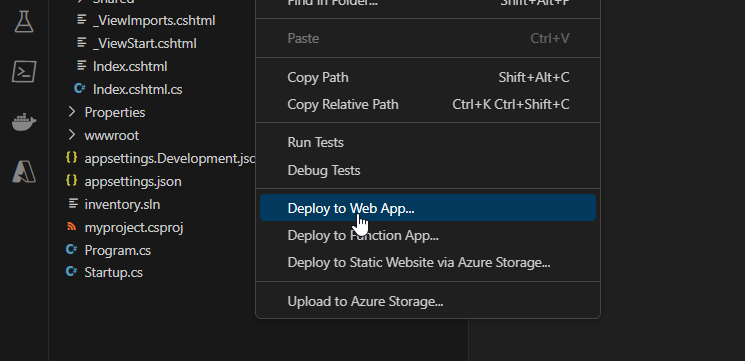
- In the VSCode file explorer, right-click anywhere and click “Deploy to Web App…“
- Click “Sign into Azure” at the top of the VSCode window, sign into Azure in your browser, and close the tab when done.
- Select the App Service you want to deploy to - and that’s it! VSCode will build and publish your application to your new Azure App Service.
Some useful things to note:
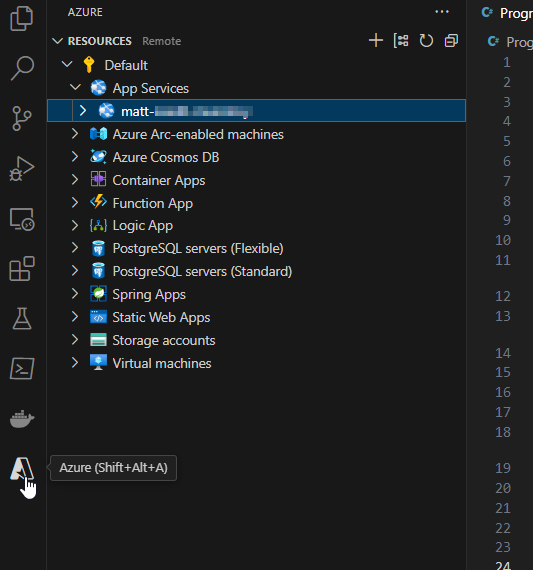
- With the Azure Resources extension, you can also browse for existing App Services:
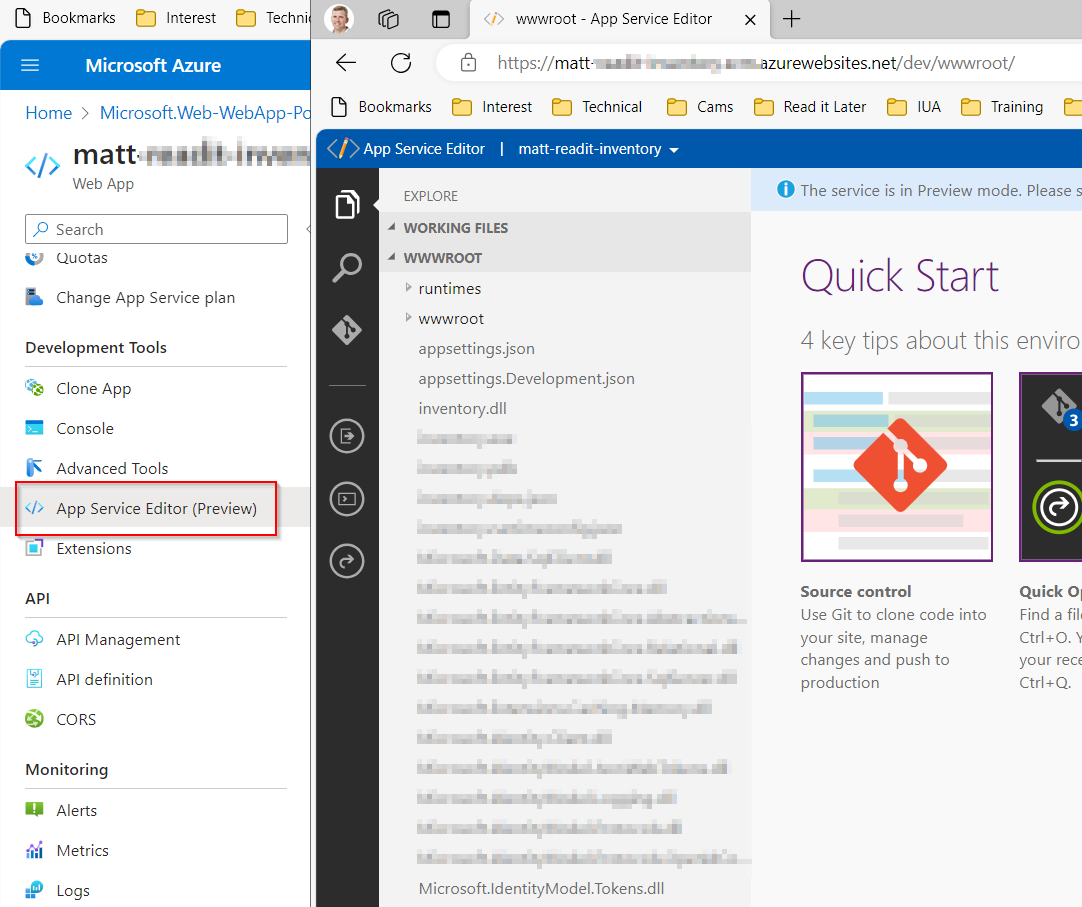
- You can browse the uploaded files using the App Service Editor which is accessible within the App Service on Azure:
Deployment Slots
- These can be created for QA, UAT versions
- The number of allowed slots depends on your plan (Standard plans allow up to 5 slots, but Free plans do not allow any)
- Slots are free - they do not occur any additional cost
- These can be accessed via their own dedicated URL
- These can also be used for beta testing, so you can route some users to a slot while you test out a new feature before shifting all users to the main production slot. Azure will use cookies to ensure a single session always goes to the same slot.
- You can deploy directly to a slot from within VSCode using the Azure extension
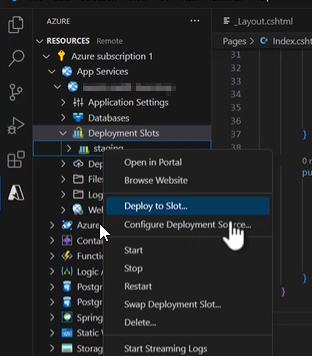
- Slots can be swapped via the Azure portal, allowing for a quick, easy way to promote versions through to production.
- Deployment slots do allow for more complex deployment types:
- Rolling - instances are updated gradually in batches. This can be tricky as you will need to support multiple versions at the same time (this is especially tricky with database changes).
- Blur-Green - New version is uploaded and accessible only to testers or to a BETA set of users.